The first thing I do when a homeowner shows me mold on a wall is ask them not to clean it yet. Not because cleaning is wrong. Because the shape of the growth is the only free diagnostic in the room, and a sponge erases it in ten seconds.
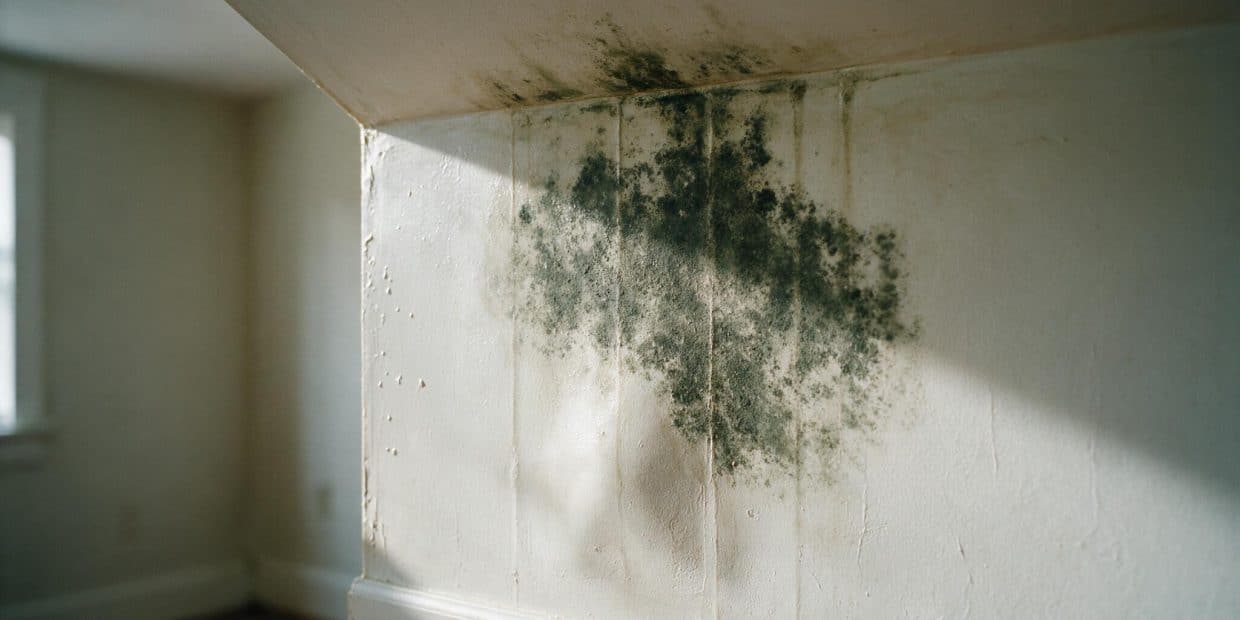
Mold does not decide where to grow. Water does. A vertical stripe down a corner is a different problem from a soft halo behind a nightstand, and both are different from a black speckle line along the top of a bathroom wall. Wipe first and you have thrown away the answer, so you clean the same spot again in April.
Here is the honest version of this job. If the patch is smaller than about 10 square feet, the drywall is painted, the board is still firm, and the leak that fed it is fixed, this is ninety minutes and about $30 in materials. If any one of those four is not true, you are looking at a different job with a different price, and no amount of scrubbing changes that.
What this page does not cover
This is a building guide. I am a drywall finisher and estimator, not a certified mold remediator and not a doctor, and you will not find a word here about what mold does to people. If anyone in the house is unwell, that conversation belongs with a physician, not with a contractor. See who I am and the disclaimer.
If the growth is larger than roughly 10 sq ft, if it followed a sewage backup or flood water, or if it sits inside the HVAC system, the US EPA points you to professional remediation with containment. That is the line I hold on site too.
Before you clean it: is that actually mold on your wall?
I get called out for mold maybe forty times a year. Something like a quarter of those turn out to be salt.
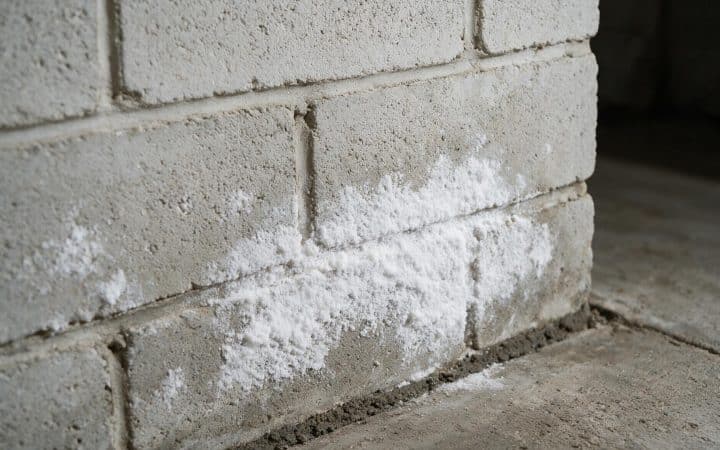
Efflorescence is what you get when water moves through masonry, picks up mineral salts, and leaves them behind on the surface as it evaporates. On a basement wall it looks like white fuzz, and every homeowner who has read one article about black mold sees it and calls me at eight in the morning. It is not a fungus. It is the ghost of water that already came through, which still tells you something worth knowing.
Four tests, none of which cost anything, and you can do all four in about a minute.
| Test | Efflorescence | Mold |
|---|---|---|
| Spray a little water on it | Dissolves and disappears | Stays put |
| Pinch it between two fingers | Crumbles to gritty powder | Smears, stays clumped |
| Smell it up close | Nothing | Musty, like wet cardboard |
| Where it sits | Only on masonry, brick, concrete | Anywhere, including painted drywall |
The one that catches people out is the surface. Efflorescence needs minerals to carry, so it comes out of concrete, block and brick. It does not grow on a painted gypsum wall. If you are looking at fuzz on drywall in a bedroom, salt is off the table.
Mildew is the other word people use loosely. In practice, mildew is the flat surface-level growth you see on bathroom grout and window sills, and it wipes off with a cloth. Mold on drywall has depth. Run a fingertip across it and you can feel it. That difference matters later, when we decide whether the board stays.
Two more impostors worth naming, because I have scrubbed both for nothing. Soot from candles or a poorly burning furnace collects on cold framing lines and produces neat dark stripes every 16 inches, which is a stud pattern, not a colony. And ordinary dust builds up on the ceiling side of a wall above a radiator. Both wipe away completely with one pass of a damp cloth. Mold does not.
The 10 square foot line, and why I hold it
The EPA’s homeowner guidance puts the DIY boundary at roughly 10 square feet, which is a patch about 3 ft by 3 ft. Under that, in most cases you can handle it yourself. Over that, the guidance sends you to the commercial remediation document, which is a polite way of saying hire someone.
That number gets treated like a legal threshold. It is not. It is a rule of thumb about disturbance. Below about 3 ft by 3 ft you can clean a wall without generating enough airborne material to matter in the rest of the house. Above it, the job needs plastic, negative pressure and HEPA filtration, and doing it without them spreads the problem into rooms that were fine that morning.
Measure what you can see, then add the part you cannot. If mold covers a strip 18 inches tall along six feet of baseboard, that is 9 square feet on the face and you are technically inside the line. But baseboard-level growth is fed from the cavity, and the back of that board is almost always worse than the front. I count the hidden face. That puts the job at 18, and it is no longer yours.
Photograph it before you touch it
Wide shot, then close-up with a tape measure in frame. Two minutes of work. If this later turns into an insurance claim, or you end up hiring a remediator, the before photo is the only proof of extent anyone will accept. I have watched claims argued down to nothing because the homeowner was tidy and fast.
Find the water first, or you are just cleaning on a schedule
Mold needs a food source, a temperature it likes, and moisture. Your wall already supplies the first two permanently. Paper facing on drywall is cellulose, and the room is heated. Moisture is the only variable you control, which makes it the only thing worth attacking.
Growth starts on wet material in about 24 to 72 hours. That short window is the useful part of the diagnosis. If mold appeared in a spot within three days of a specific event, the event is your source. If it crept in over a winter with nothing dramatic happening, you are looking at condensation, not a leak, and those two get fixed in completely different ways.
| Where it shows up | What it usually means | Where to look |
|---|---|---|
| Low on the wall, along the baseboard | Water arriving from below or from the cavity | Slab, foundation, dishwasher, washing machine pan |
| A vertical stripe in a corner | Water tracking down a stud or a pipe chase | Roof, gutter overflow, supply line above |
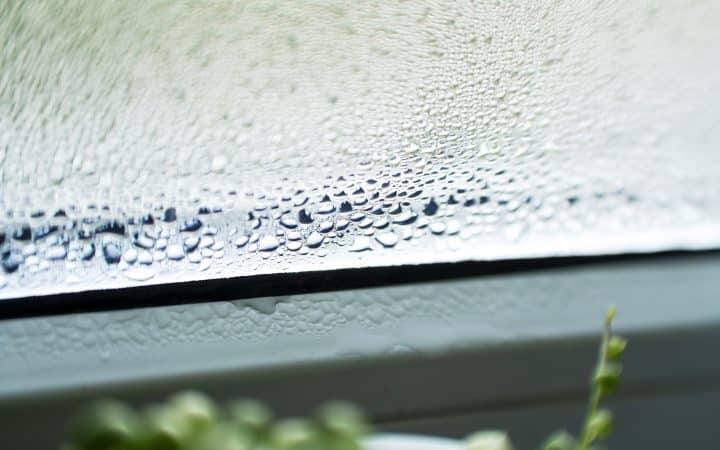
| High on an exterior wall, worse in winter | Condensation on a cold surface | Missing insulation, thermal bridge, humidity |
| A defined patch behind furniture | Dead air against a cold wall | Move furniture 2 in off the wall, no leak needed |
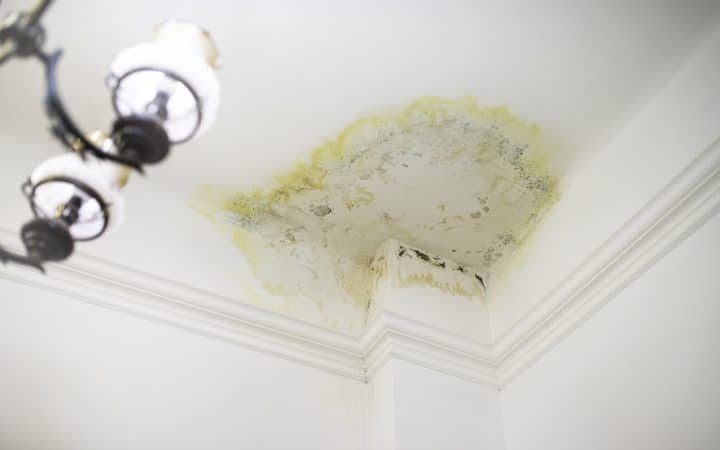
| Ceiling line spreading down the wall | Something above is wet | See reading a ceiling stain |
The cheapest diagnostic I know still costs a dollar. Buy a hygrometer, put it in the room, and read it morning and night for a week. If the house runs above 60 percent relative humidity in the cold months, the wall is not leaking. The house is breathing wet, and no cleaning product fixes that.
What actually kills mold on walls, and what just moves it around
Everyone arrives at this job holding a jug of bleach. It is the wrong bottle for a drywall wall, and the reason is physical rather than chemical.
Bleach is mostly water. On a non-porous surface such as tile or a glazed sink, the chlorine does its work at the surface and the water evaporates. On drywall, the chlorine stays near the face while the water soaks into the gypsum and the paper. You bleach the visible layer pale and you feed what is underneath. That is why a bleached patch so often reappears, slightly larger, six weeks later. The EPA’s own homeowner guidance says bleach is not required for routine cleanup, which surprises people every time I mention it.
| What you can use | Good for | Weakness | Cost |
|---|---|---|---|
| Dish detergent and warm water | Painted drywall, the EPA’s default recommendation | Removes growth rather than sterilizing anything | $0 |
| White vinegar, undiluted | Semi-porous surfaces, penetrates better than bleach | Smells for a day, slow, needs dwell time | $4 |
| 3% hydrogen peroxide | Non-porous surfaces, light staining | Weak on anything rooted, can lighten paint | $3 |
| Borax solution | Framing and bare wood in an opened cavity | Leaves residue, do not use on finish surfaces | $8 |
| Household bleach | Tile, grout, tubs, glazed surfaces | Poor on drywall, adds water to the problem | $5 |
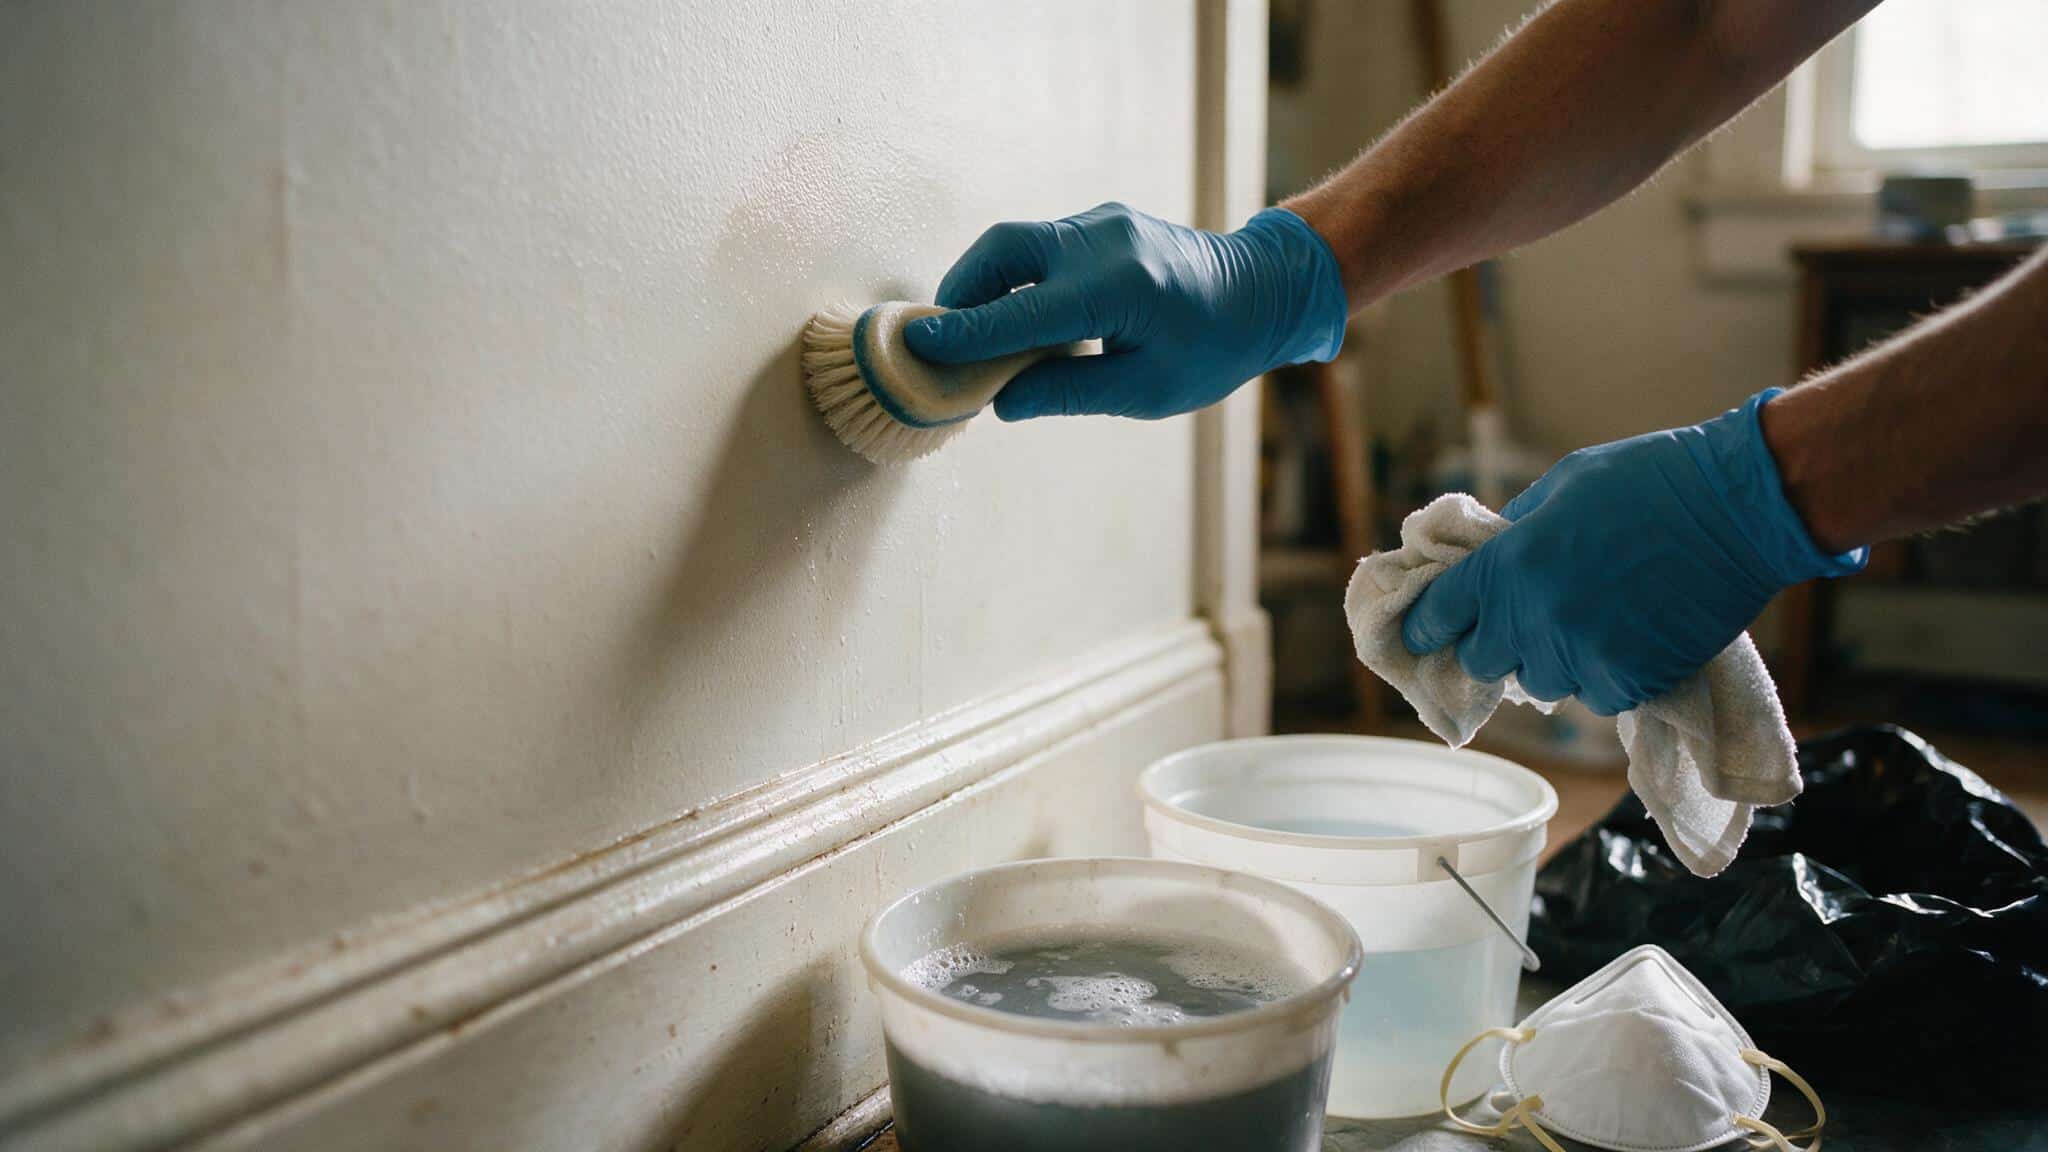
My working kit for a wall is boring: warm water with a few drops of dish soap in one bucket, clean rinse water in a second, a soft brush, and a stack of rags I intend to throw away. That is the whole arsenal. If I want a second pass I use vinegar, let it sit fifteen minutes, and wipe.
Two things I will not do. I will not mix bleach with vinegar or with ammonia, ever, because that produces chlorine gas in a room you are standing in. And I will not dry-brush or sand a moldy wall. Sanding takes something stuck to a surface and turns it into something in the air, which is the single fastest way to turn one bad wall into three.
How to get rid of mold on walls, step by step
This is the sequence for a patch under 10 square feet on painted drywall, with the water source already found and fixed. Skip the fix and the rest of this is housekeeping.
-
Kill the moisture source and prove it is dead
Repair the leak, then wait out one full cycle of whatever caused it. A rain, a laundry day, a shower week. If the wall stays dry through the cycle that used to wet it, you have the right source. If it does not, stop here, because everything after this is temporary.
-
Put on the gear, and shut the HVAC off
An N95 that seals against your face, nitrile gloves to mid-forearm, and eye protection that is not vented. Turn off heating and air conditioning so the ducts are not pulling from the room, close the door, and open a window. That is homeowner-scale containment, and for a 3 ft by 3 ft patch it is enough.
-
Wash rather than scrub
Warm water, a few drops of dish soap, a soft brush, light circular pressure. You are trying to lift growth off the paint film without cutting through it. The moment the brush starts to fuzz the paint, ease off. Wipe with a damp cloth, rinse the cloth in the second bucket, and change the water when it goes gray.
-
Work outward, and change rags often
Start at the clean edge and move in toward the worst of it, not the other way around. Every rag gets used on one section and goes straight into the bag. Rags that travel around the room are how a contained job stops being contained.
-
Bag the waste inside the room
Rags, brush, gloves, drop sheet, all of it into a contractor bag that you seal before it leaves through the door. Do not carry an open bucket of dirty water through the hallway.
-
Dry it properly, which is the step everybody skips
Wipe the wall down, then put a fan on it and run a dehumidifier for 48 hours. Aim the fan across the wall at an angle rather than straight at it. Straight-on air dries the paint film in twenty minutes and leaves the gypsum behind it damp, and damp gypsum starts the clock again in a day or two.
-
Wait a week before you paint
A week gives regrowth time to show. If nothing comes back on a wall you have dried properly, seal and repaint. If a faint shadow returns in the same footprint, you did not find the water, and paint will hide that fact for exactly one season.
Painted or bare: the paper test that decides clean or cut
Cleaning works on a wall whose paint film is intact. Paint is a barrier, and if mold is sitting on top of it, you are washing a surface. The moment growth has reached bare paper, that stops being true, because the paper facing is cellulose and mold puts filaments into it that no cloth reaches.
So before deciding anything, press the wall with two fingers at the center of the patch. Firm and springy means the core is sound and the job is a wash. Soft, spongy, or a surface that dents and stays dented means the gypsum has taken on water and the paper has let go of the core. That board is finished. Cleaning it changes its color and nothing else.
The industry standard behind that judgment is straightforward: porous materials that stayed wet longer than 24 to 48 hours get removed rather than cleaned. Drywall is porous, so is the insulation behind it, and so is the carpet pad at the bottom of the wall. Wet fiberglass in particular never dries in place. I have pulled batts three months after a leak that were still heavy.
If the board has to come out, that is a cut-and-patch job rather than a cleaning job, and the numbers move accordingly. The cutting itself is ordinary work, covered in the drywall repair cost breakdown, but moldy board gets bagged at the wall rather than carried out in an armful, and the cavity gets dried and treated before anything closes back up.
A 2 ft by 2 ft patch of board costs about $12 in materials
Half a sheet, a few feet of tape, a pint of compound. Cleaning a board that is already soft, then repainting it, then cutting it out in September when the shadow returns, costs the same $12 plus the paint plus the second Saturday.
Bathroom mold and cold-wall mold are two different problems
Both look like the same speckle. They are fed by completely different mechanisms, and treating one like the other is why people clean the same wall annually.
Bathroom growth is a ventilation failure. Warm wet air is produced faster than the fan removes it, so it condenses on the coolest available surface, which is usually the ceiling above the shower or the top corner of the outside wall. The fix is airflow. Run the fan during the shower and for twenty minutes after, which almost nobody does, and check that the duct actually goes outside rather than dumping into the attic. I find ducts terminating in attic insulation several times a year, and the mold is always directly above.
Cold-wall growth is an insulation failure, and it has a signature. It appears on exterior walls only, it gets worse in winter, and it often draws a grid: dark rectangles between studs where insulation is thin, clean lines over the studs themselves where the wood is warmer. That is thermal bridging drawn on your paint. A room can sit at a perfectly reasonable 50 percent relative humidity and still grow mold on a wall surface cold enough to push the local reading above 80.
Which is why raising the wall temperature is the actual repair. Insulate the cavity, cut the bridge, or at minimum get air moving across that surface and pull the furniture off it. Cleaning a cold wall gets you a clean cold wall.
Signs the mold is behind the drywall
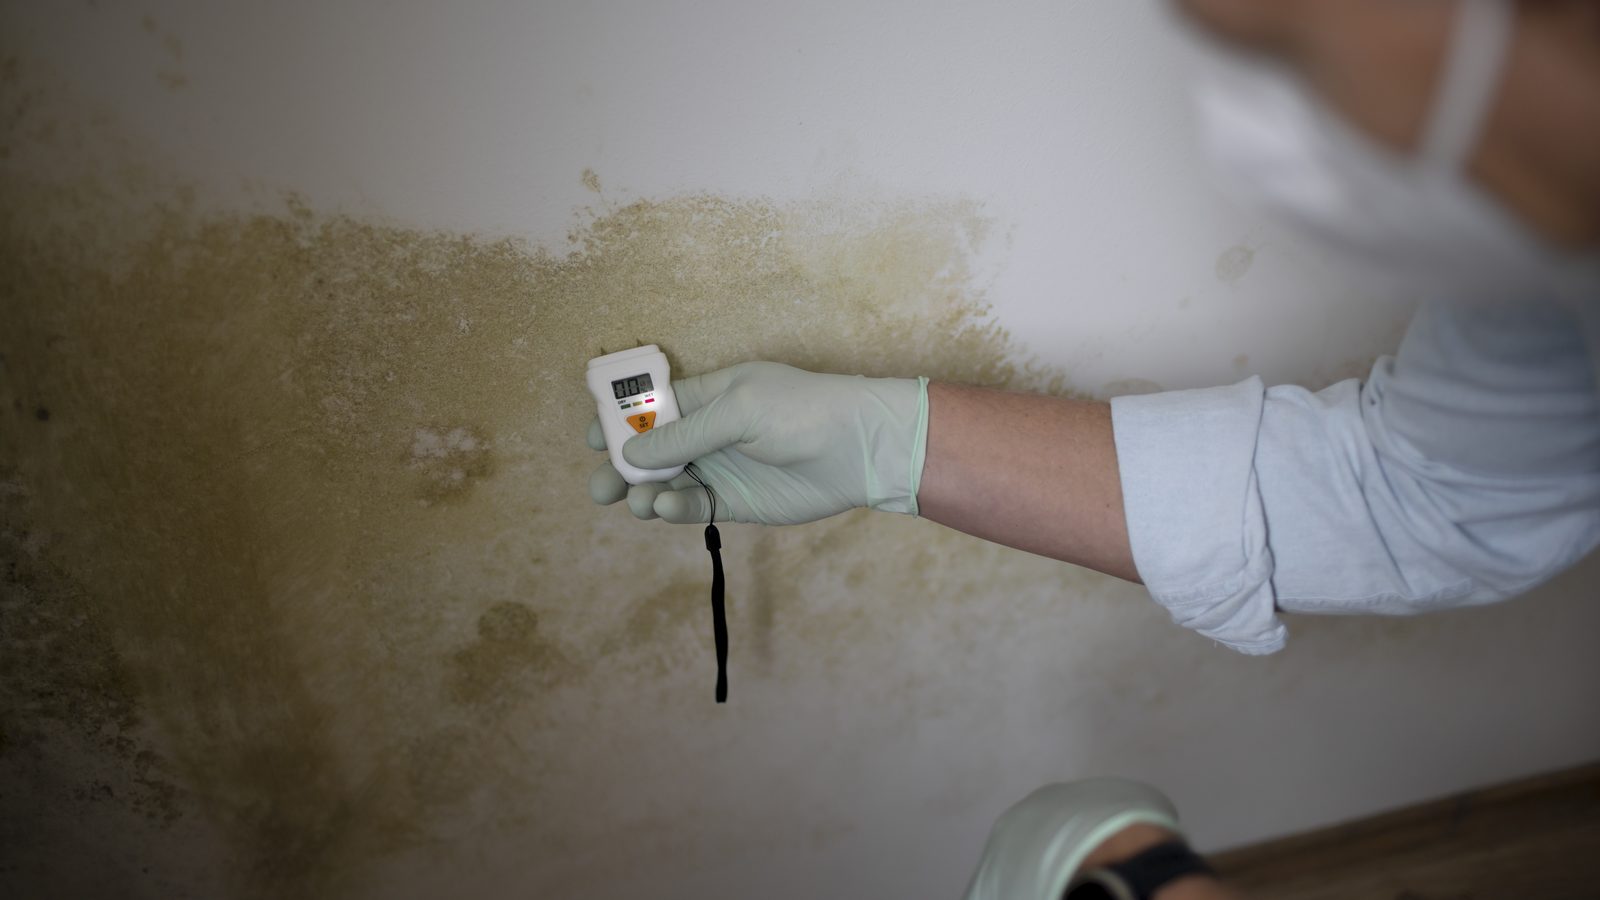
What you can see is sometimes the smaller half. The cavity is dark, unventilated, and lined with paper on both faces, which is a better growing environment than the room side ever is.
The tells, roughly in the order I trust them:
- A musty smell that is stronger near an outlet or a switch than in the middle of the room. Outlets are holes in the vapor barrier, so they vent the cavity into the room.
- Paint bubbling or lifting in a patch with no visible water above it.
- Baseboard cupping away from the wall, or trim nails staining through the paint.
- Drywall that gives under pressure and does not spring back.
- Growth that returns in exactly the same footprint after a competent cleaning.
Two of those together is enough for me to open a hand-sized inspection hole low on the wall, in a spot the baseboard will cover afterward. It is a two-minute cut and it converts guessing into looking. Do it with the HVAC off and a bag under the cut, because the first thing an opened cavity does is release whatever was in it.
What you find decides who finishes the job. A dry cavity with a stained but firm paper backing is still yours. Visible growth on the back of the board, on the framing, or in the insulation is a containment job, and at that point you are hiring rather than cleaning.
What getting rid of mold on walls costs in 2026
The spread here is wider than in almost any other repair I quote, because the price is set by access and containment rather than by the size of the stain.
| Job | What it involves | DIY | Pro, 2026 |
|---|---|---|---|
| Surface patch under 10 sq ft, painted wall | Wash, dry, prime, repaint | $25 to $60 | $150 to $500 |
| Cut out and replace a 2 ft by 2 ft section | Remove board, dry cavity, patch, finish | $40 to $90 | $350 to $900 |
| Contained remediation, 10 to 100 sq ft | Barriers, negative air, HEPA, disposal | Not a DIY job | $15 to $30 per sq ft |
| Typical whole-job remediation invoice | Most single-room cases | — | $1,200 to $3,750 |
| Independent air or surface testing | Sampling plus lab report | — | $300 to $700 |
Two notes on reading that table. Containment scales with difficulty of access as much as with area, so 40 square feet of open wall in an empty bedroom prices better than 15 square feet behind a built-in cabinet. And a remediation quote almost never includes the repair. Removing the material and drying the cavity is one contract. Boarding, taping, finishing and painting is a second one, and the second is the part people forget to budget for. The full cost index has the finishing side.
On testing, my position is unpopular with labs. If you can see it and smell it, you already know it is there, and a $500 report will not change what has to happen to the wall. Testing earns its money in two situations: a dispute with a landlord, insurer or seller where you need a document, and a case where the smell is obvious but nobody can find the source.
Sealing and repainting: what mold resistant paint actually does
Paint is not a treatment. It is a finish, and it goes on a wall that is already clean and already dry. Rolling over live growth buries it under a film that traps the moisture underneath, and the same patch comes back through the new coat with the edges softened. I can spot a painted-over patch across a room, because the sheen never quite matches and the outline is too neat.
The right sequence is dry, then check at a week, then prime, then topcoat. If the wall has a brown tannin or water stain left behind, use a stain-blocking primer, because a standard latex primer lets water-soluble staining bleed straight back through. That is the same failure I describe at length on the ceiling stain page, and it happens on walls for the same reason.
Mold resistant paints contain a fungicide in the film. They earn their keep in a bathroom or a laundry room, where the wall will get wet again no matter what you do. They do nothing at all about the water in the cavity behind them, and buying one instead of fixing a leak is money spent on a nicer looking failure.
One thing worth doing while the wall is open, if you have cut board out. Paper-faced drywall is the food. Paperless glass-mat board costs a few dollars more per sheet and takes that food off the table. In a basement, a bathroom, or the bottom four feet of a garage wall, I use it as a matter of course.
Keeping the wall dry so it does not come back
ASHRAE and the EPA both land on the same range: keep indoor relative humidity between 30 and 50 percent, and below 60 at all times. Above 60 for sustained periods, wall surfaces start to hold enough moisture for growth without any leak involved.
| Season | Why | Target indoor RH |
|---|---|---|
| Cold months | Warm wet air condenses on cold glass and exterior walls | 30 to 40% |
| Mild months | Comfort range, low dust mite and mold pressure | 40 to 50% |
| Humid summer | Ceiling on any season, dehumidify above this | Under 60% |
The rest of the maintenance list is short and unglamorous. Pull furniture two inches off exterior walls so air can move behind it. Run the bathroom fan for twenty minutes after the water stops, on a timer switch if you will not remember. Put a dehumidifier in the basement and set it to 50. Clear gutters twice a year, since most of the wall leaks I find upstairs started as water coming over the front edge of a blocked gutter.
And walk the house once each spring with a flashlight held almost flat against the wall. Raking light shows a bulge, a shadow or a lifted seam months before you would notice it standing straight on. It is the same trick I use to check a finish job, and it works just as well for finding water.
Questions I get on site
Is black mold on walls different from the rest?
Not from a building point of view. Color comes from the species and from what it is eating, and plenty of dark growth on a wall is a common household species with no special status. You cannot identify anything by looking at it, and for deciding what to do to the wall it does not matter: the size of the patch, the state of the board and the source of the water decide the work. Anything beyond that is a lab question and a medical question, and neither is mine.
What kills mold permanently?
Dryness. There is no product that makes a wall immune, because spores are in the air of every building on earth and always will be. A surface that stays under 60 percent humidity and never gets wet does not grow anything, whatever you did or did not spray on it. Anyone selling permanence in a bottle is selling you the wrong thing.
Mould or mold?
Same word, same fungus. Mold is the US spelling, mould is used in the UK, Ireland, Australia and Canada. If you are reading a British page about the problem, remember the building assemblies differ too. Solid masonry walls with no cavity behave nothing like American stud-and-gypsum construction, and advice written for one can be actively wrong for the other.
Can I just paint over it if I am selling the house?
You can, and it will be found. Inspectors carry moisture meters and they check exactly the places people paint. Beyond that, most states require disclosure of known moisture damage, and a fresh rectangle of paint on one wall of an otherwise tired room is the first thing an inspector photographs.
The mold is on a textured ceiling in an old house. Same job?
No, and this is the one place I will stop you outright. Sprayed textures applied before the US ban can contain asbestos, and scrubbing or scraping one releases fibers. Do not touch it until it has been tested. Start with what triggers an asbestos test, and if it comes back positive, the two removal price bands explain what you are choosing between.
Does homeowners insurance cover this?
Sometimes, and the wording is what decides it. Policies generally cover damage that is sudden and accidental, and generally exclude continuous or repeated seepage over a period of time. A burst supply line last Tuesday tends to be covered. A shower pan that has been weeping for two years tends not to be, and mold is usually treated as a consequence of the water event rather than as its own peril. Read your own policy, call your carrier early, and keep the photographs.
Where I would start tomorrow morning
Measure the patch. Under 3 ft by 3 ft on a firm painted wall, with the water found and stopped, buy nothing and use dish soap. Over that, or on a board that dents, put the sponge down and get a quote, because the containment is the part you cannot improvise.
Then buy the hygrometer. It is the cheapest thing in this entire article and it answers the only question that matters six months from now, which is whether the wall is going to stay dry. Everything else on this page is cleanup. That one is the repair.
More on the water side of the house in moisture and mold, and the pricing for anything that ends in a patch is in the cost index.